NVIDIA Jetson Xavier NX 将PyTorch(.pt)模型转为TensorRT加速推理
本文最后更新于 2024-10-08,当前距离文章发布(更新)已经超过365天,文章内容可能已经过时,请注意甄别。
使用PyTorch导出ONNX再使用trtexec转换为engine
这种方式导出的兼容性最好,可以用于Triton服务器部署,也可以用Python代码直接使用模型推理。
准备PyTorch模型
对YOLOv8进行训练之后,在train/run**/weights文件夹内会有last.pt和best.pt,这就是需要准备好的模型文件。
准备环境
在NVIDIA Jetson Xavier NX最后的JetPack版本5.1.3上,Python3.8已经配置好了tensorrt==8.5.2.2,系统TensorRT版本是8.5.2,可以直接使用。
系统自带TensorRT的位置:/usr/src/tensorrt/bin/trtexec
使用Ultralytics自带工具导出Onnx模型
非常简单,只要一行命令:
yolo export model=你的模型.pt format=onnx等待转换完成,就会输出同名模型.onnx
使用trtexec转换Onnx为engine
同样很简单,一行命令:
/usr/src/tensorrt/bin/trtexec --onnx="你的Onnx格式模型.onnx" --saveEngine="指定导出文件名.engine"等待转换完成,就得到一个.engine文件,改名为model.plan就可以直接部署到Triton Server的模型库中。
使用Ultralytics官方提供脚本一键导出engine
警告⚠️:此方法兼容性极差,经测试(XavierNX JP5.1.3)使用此方法导出模型后,模型无法被用于Triton部署,只能在Python环境中编程调用,且需要额外配置onnx_runtime_gpu等环境,谨慎使用。
准备环境
参考:
https://blog.csdn.net/qq_41847894/article/details/124228984
https://docs.ultralytics.com/zh/integrations/tensorrt/#configuring-int8-export
使用Ultralytics提供的脚本转换之前,还需要先配置好环境,如果直接转换,会报错缺少onnxsim和onnxruntime-gpu包

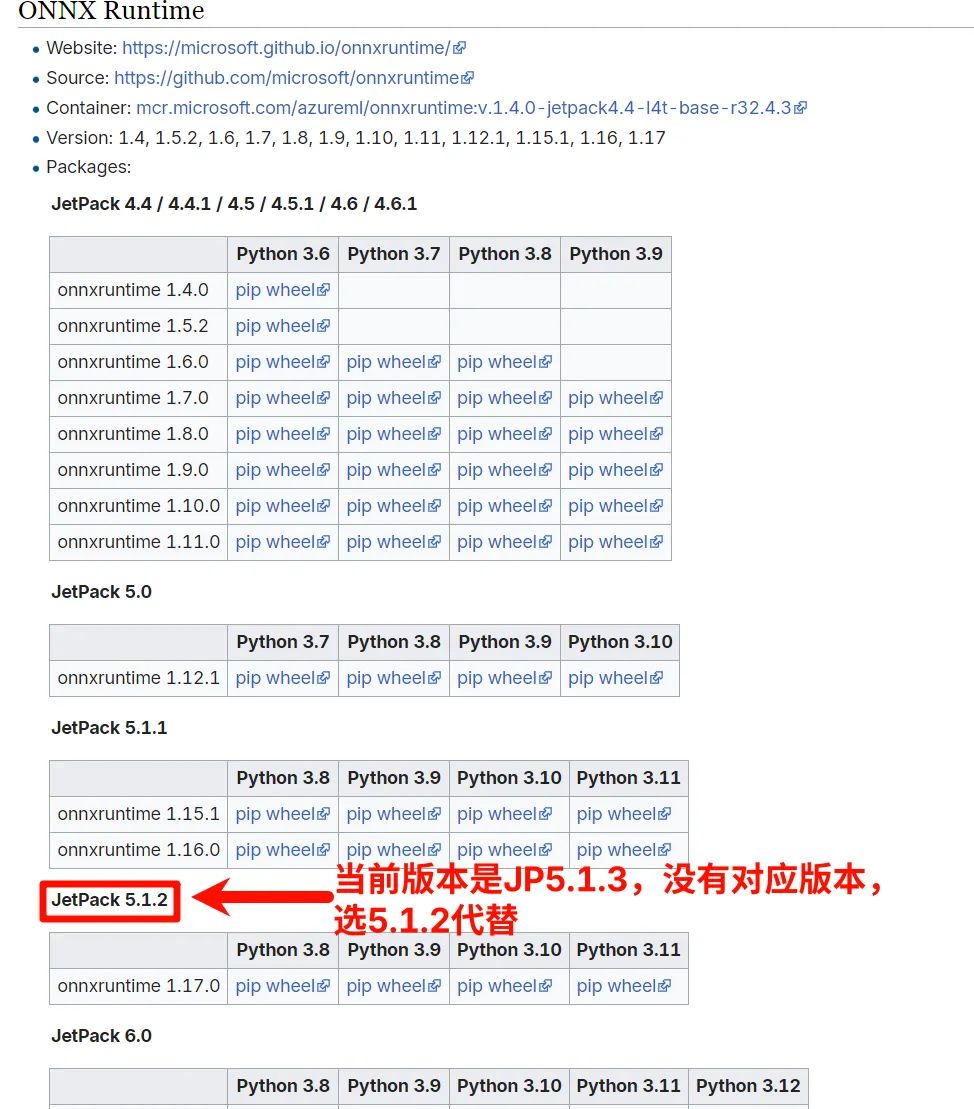
必须手动安装onnxruntime-gpu的wheel文件。
在这里下载合适的whl文件:https://elinux.org/Jetson_Zoo#ONNX_Runtime

上传到Jetson之后,使用pip安装:
pip install onnxruntime_gpu*.whl安装完onnxruntime-gpu之后,就可以直接用pip安装onnxsim了:
pip install onnxsim…等待编译安装

使用Ultralytics自带工具导出engine
参考官方文档:https://docs.ultralytics.com/zh/integrations/tensorrt/#exporting-tensorrt-with-int8-quantization
yolo export model=你的模型.pt format=engine使用模型
Python编程直接调用
这种方式支持任意方式转换出的engine文件,且简单快速。
部署TritonServer后使用Python编程调用接口
安装所需的软件包
pip install tritonclient[all]编写Python脚本调用:
from ultralytics import YOLO

model = YOLO(f'http://localhost:8000/yolov8n_e500_b50', task='detect')
# triton_client = grpcclient.InferenceServerClient(url='localhost:8001')

results = model(stream=True, source=0, show=True)- 感谢你赐予我前进的力量


